Preparing the Raspberry Pi#
This page will guide you from unboxing a Rasbperry Pi, to taking your first pictures.
We will be following advice from the main Raspberry Pi documentation. It is a fantastic resource, if your project needs a different method of installation.
Already have a Raspberry Pi?
You can skip ahead to the next section Installing DynAikonTrap if you already have a Raspberry Pi that
Has Raspberry Pi OS Buster,
Note that this is not the latest Raspberry Pi OS. Check
/etc/os-releaseto see whatVERSION_CODENAMEyou have. It must bebuster.If you do not have Buster, you will need to back up your important data from the Raspberry Pi onto another storage medium and re-install Raspberry Pi OS Buster. Once your data has been backed up, you can follow this guide. It will wipe your SD card and install a fresh version of Raspberry Pi OS Buster.
Has the camera module enabled, with a camera module that is working and in focus,
The camera module can be enabled via
raspi-configwithout re-installing Raspberry Pi OS, if it is not already. Ensuring that the camera works, and is in focus can be done as in sections Enabling the camera module software and Testing that the Camera works.Has an expanded filesystem,
This can be enabled via
raspi-configwithout re-installing Raspberry Pi OS, if it is not already. See how to do this in 2 Expanding the Filesystem.and you are comfortable logging into your Raspberry Pi remotely over
ssh.
If not, the following will guide you through the necessary steps to ensure these 4 things.
Necessary Hardware#
You will need
A Raspberry Pi
Any model should work, but for lowest power consumption, use a Raspberry Pi Zero or Zero 2 W.
A micro SD card
Whilst Raspberry Pi Foundation recommends a minimum of 8GB we recommend using a 64GB SD card. This will help the performance of your trap.
Back up data from SD Card!
When installing Raspberry Pi OS to the SD card, we will wipe all of its contents. Please ensure you have backed up all important data on the SD card before proceeding.
A power supply for the Raspberry Pi
A Raspberry Pi Camera module
We officially support and develop for the Raspberry Pi Camera Module. Other (unsupported) camera modules are available and might be better for your animal trapping application.
An ethernet cable (If you won’t use Wi-Fi).
You will also need another computer, tablet or mobile phone from which you will then control your Raspberry Pi. This device should have the capability of reading and writing to your micro SD card.
Necessary Software#
Imaging Tool#
You will need a method of flashing Raspberry Pi OS to your SD card. We recommend using the Raspberry Pi imaging tool for this, available for Linux, MacOS and Windows.
If you do not have permanent access to a computer with an SD card slot, don’t worry: once the SD card has been prepared, all remaining steps can be performed from any device that has a Secure Shell (SSH) client. You can even manage the camera trap from such a device in perpetuity.
SSH Client#
The Raspberry Pi Foundation has an extensive article about remote (secure) shell access from different platforms.
Here is a list of examples of SSH clients for different platforms
Platform |
Client |
|---|---|
Linux |
SSH is pre-installed, and available in the Terminal |
MacOS |
SSH is pre-installed, and available in the Terminal |
Windows |
|
iOS/iPadOS |
|
Android |
Termux (Available via F-Droid, the Google Play Store version is deprecated) |
Other clients are available, and in no way is this list an endorsement for these particular programs. This particular clients happen to be open source (with the exception the Windows 10 pre-installed terminal).
1 Installing Raspberry Pi OS#
First we will prepare the SD card with Raspberry Pi OS. This process is often colloquially called “flashing” for historical reasons. This entails downloading the operating system (Raspberry Pi OS Legacy, based on Debian Buster version 10) and copying the files to the SD card.
We recommend using the official Raspberry Pi imaging tool for this. If you usually use a different tool to flash SD cards, feel free to use that instead.
DynAikonTrap is written to work on Raspberry Pi OS (Legacy), this is the Raspberry Pi OS based on Debian version 10 codname Buster.
What is Raspberry Pi OS?
The Raspberry Pi can run many different operating systems, notably: Ubuntu, Manjaro, ArchLinuxArm, Apertis, RISC OS Pi. The officially supported operating system, however, is called Raspberry Pi OS.
Security of older Rasperry Pi OS versions
Every Debian release (and therefore Raspberry Pi OS release) is expected to get 5 years of support for security updates. So, just because you are running the previous version, doesn’t mean your device is less secure.
To save SD card space, reduce installation time and reduce load on the Raspberry Pi when running, we recommend installing Raspberry Pi OS Lite (Legacy) this is a headless install of Raspberry Pi OS based on Debian 10 codename Buster.
What is a headless setup?
Using a headless Raspberry Pi means controlling your Raspberry Pi via another computer over the internet. That way, your Raspberry Pi doesn’t need a keyboard or monitor, hence “headless”. This is how many servers operate the world over.
That may sound scary, but don’t worry! It’s no more complicated than the full installation you would do to use a mouse and keyboard on the Raspberry Pi. In fact many people would argue that using your Raspberry Pi in the headless way is easier. Ultimately, the idea is that you don’t need to have your Raspberry Pi in front of you to use it: exactly what you want when using it as a camera trap.
We will use a tool called SSH (Secure SHell) to connect to your Raspberry Pi from your main computer i.e. a desktop or laptop PC.
If you do not feel comfortable configuring your Raspberry Pi for headless operation, you can also do a full install using a keyboard and mouse.
Lite install vs Standard install
The Raspberry Pi Foundation provides two different flavours of each release 32/64-bit release: a standard release and a lite release. The difference being how much pre-installed software comes with the initial install. Importantly, the lite release is configured to be used in a headless setup.
To save SD card space, reduce installation time and reduce load on the Raspberry Pi when running, we recommend installing Raspberry Pi OS Lite (Legacy) this is a headless install of Raspberry Pi OS based on Debian 10 codename Buster.
Switching between Lite and Standard intsalls
Whilst we recommend a lite install to save SD card space, reduce installation time and reduce load on the Raspberry Pi when running, one can switch between standard and lite installs any time later on.
Installing a desktop environment (e.g. Gnome, KDE) and enabling the
corresponding display manager (e.g. gdm for Gnome, or sddm for KDE)
will convert any lite intall into a full install.
Conversely, any standard installation can later be converted to a lite installation by removing the desktop environment, or just by simply disabling the display manager service.
DynAikonTrap does not work on the latest Raspberry Pi OS, which is based on Deban version 11 codename Bullseye.
To summarise, the Raspberry Pi Foundation offers the following versions
Raspberry Pi OS (Not compatible) Standard install, Debian 11 codename Bullseye;
Raspberry Pi OS Lite (Not compatible) Headless install, based on Debian 11 codename Bullseye;
Raspberry Pi OS (Legacy) Standard install, based on Debian 10 codename Buster;
and finally, the recommended version for DynAikonTrap
Raspberry Pi OS Lite (Legacy) Headless install, based on Debian 10 codename Buster.
The relationship between Debian and Raspberry Pi OS
Raspberry Pi OS is based on another operating system called Debian. Hence, for each new Debian release, there is a new Raspberry Pi OS release. Furthermore, each Debian release (and hence Raspberry Pi OS release) is given a codename. For example the last three releases have been called Bullseye (Version 11), Buster (Version 10), Jessie (Version 9).
However, in attempt to simplify things, the Raspberry Pi Foundation simply calls the lateest release of Raspberry Pi OS Raspberry Pi OS, and the previous version Raspberry Pi OS (Legacy).
At time of writing, this means that Raspberry Pi OS is based on Debian Version 11 codename Bullseye; and Raspberry Pi OS (Legacy) is based on Debian Version 10 codename Buster.
With all that said, one can see how different people will use different names for the same thing. For example, the following phrases all mean the same thing:
Raspberry Pi OS Buster
Raspberry Pi OS based on Debian Buster
Raspberry Pi OS version 10
Raspberry Pi OS Debian version 10
Raspbian version 10
Raspberry Pi OS based on Debian 10 (Buster)
Raspberry Pi OS (Legacy)
The “Legacy” term used for the previous release is especially confusing, because this will change over time, once the next version is released. If you are ever unsure, try to figure our the Debian Version or the codename (e.g. “Bullseye”).
Codenames of releases
Giving releases of software “codenames” is more common than one might think. The Debian project names each release after a character from the movie Toy Story.
From 2009 until 2018 Android named each release after a new dessert, in ascending alphabetical order from Cupcake (Version 1.5) to Pie (Version 9).
From version 2000 until 2012 Apple named releases of MacOS after big cats (e.g. Mountain Lion, Puma) and since 2012 each release of MacOS was named after a location in California (e.g. Yosemite, Ventura).
Ubuntu, which like Raspberry Pi OS, is an operating system based on Debian names each release after an animal with an alliterating adjevtive in ascending alphabetical order (e.g. Breezy Badger, Groovy Gorilla).
Flashing the SD Card#
Insert the SD card into your computer
Start the Raspberry Pi imaging tool. You will be met with a welcome screen.
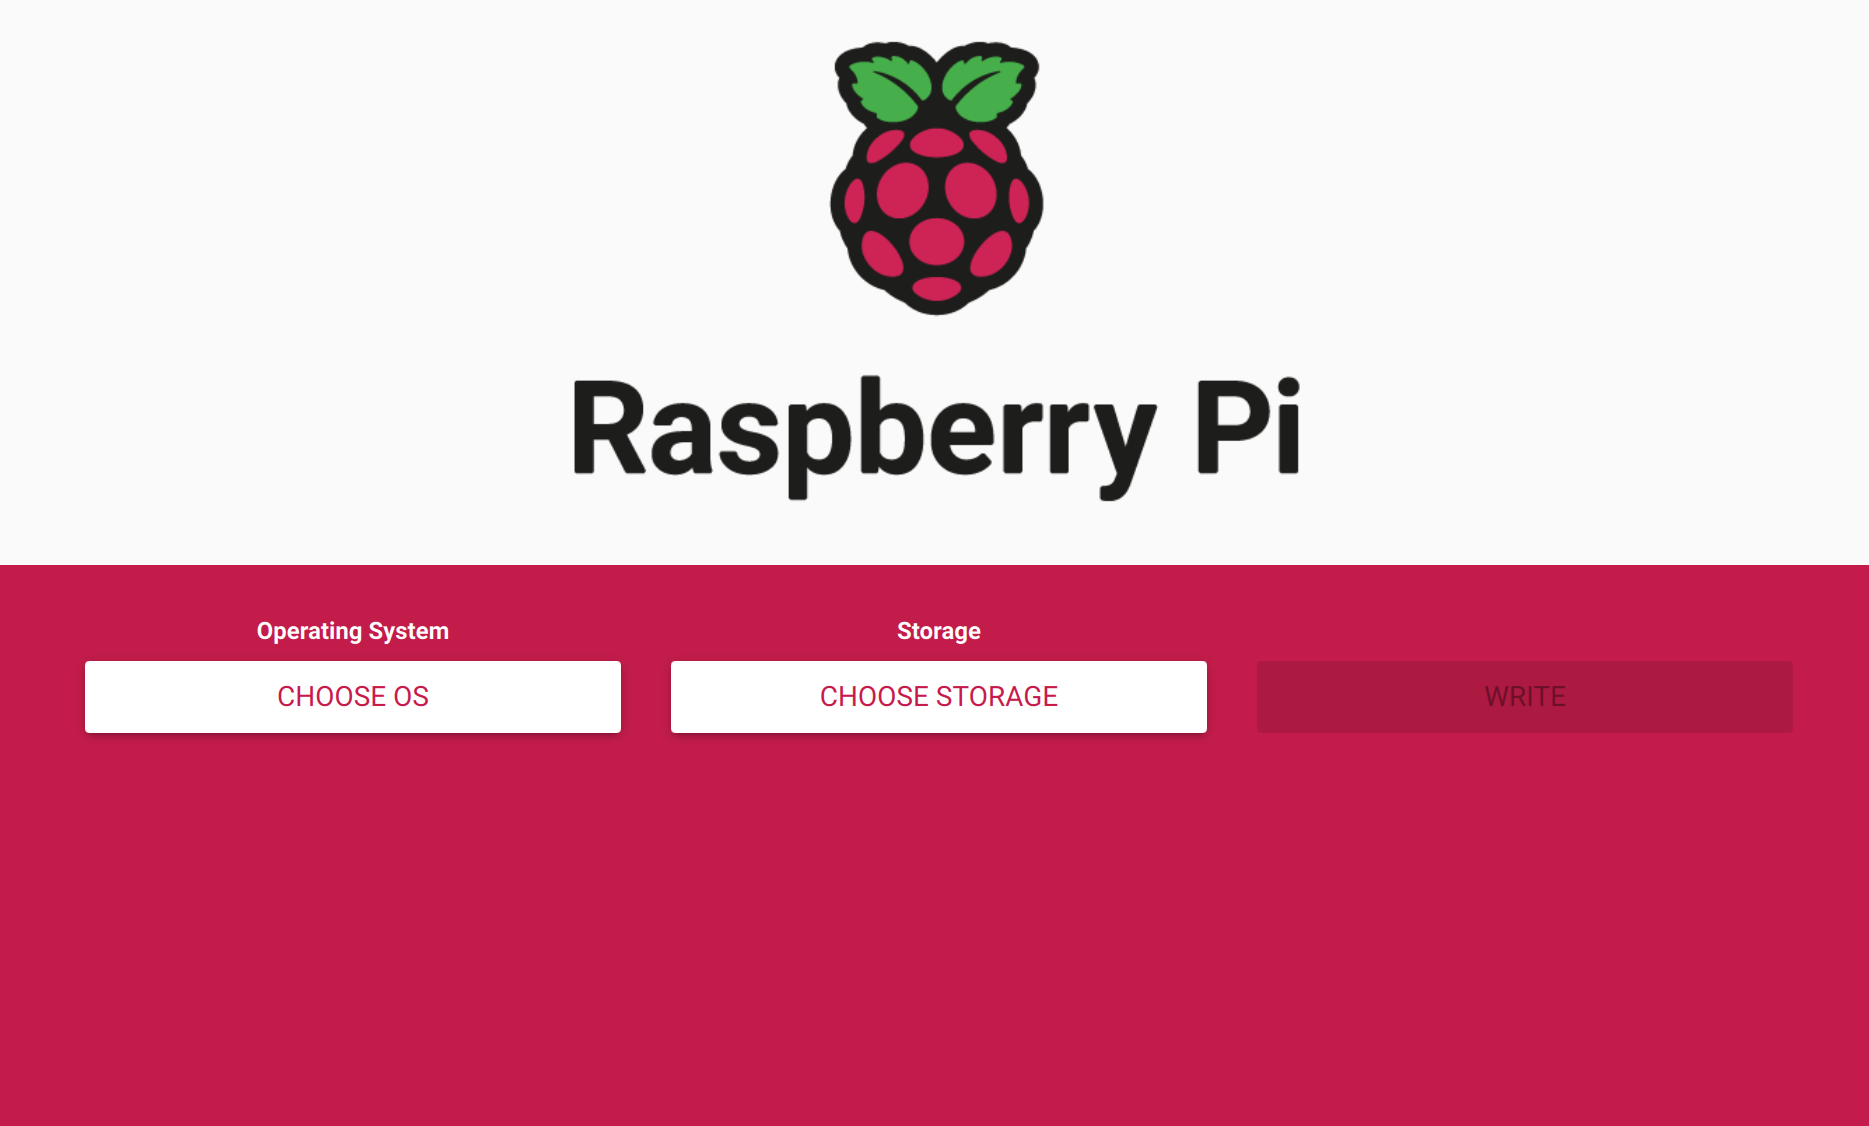
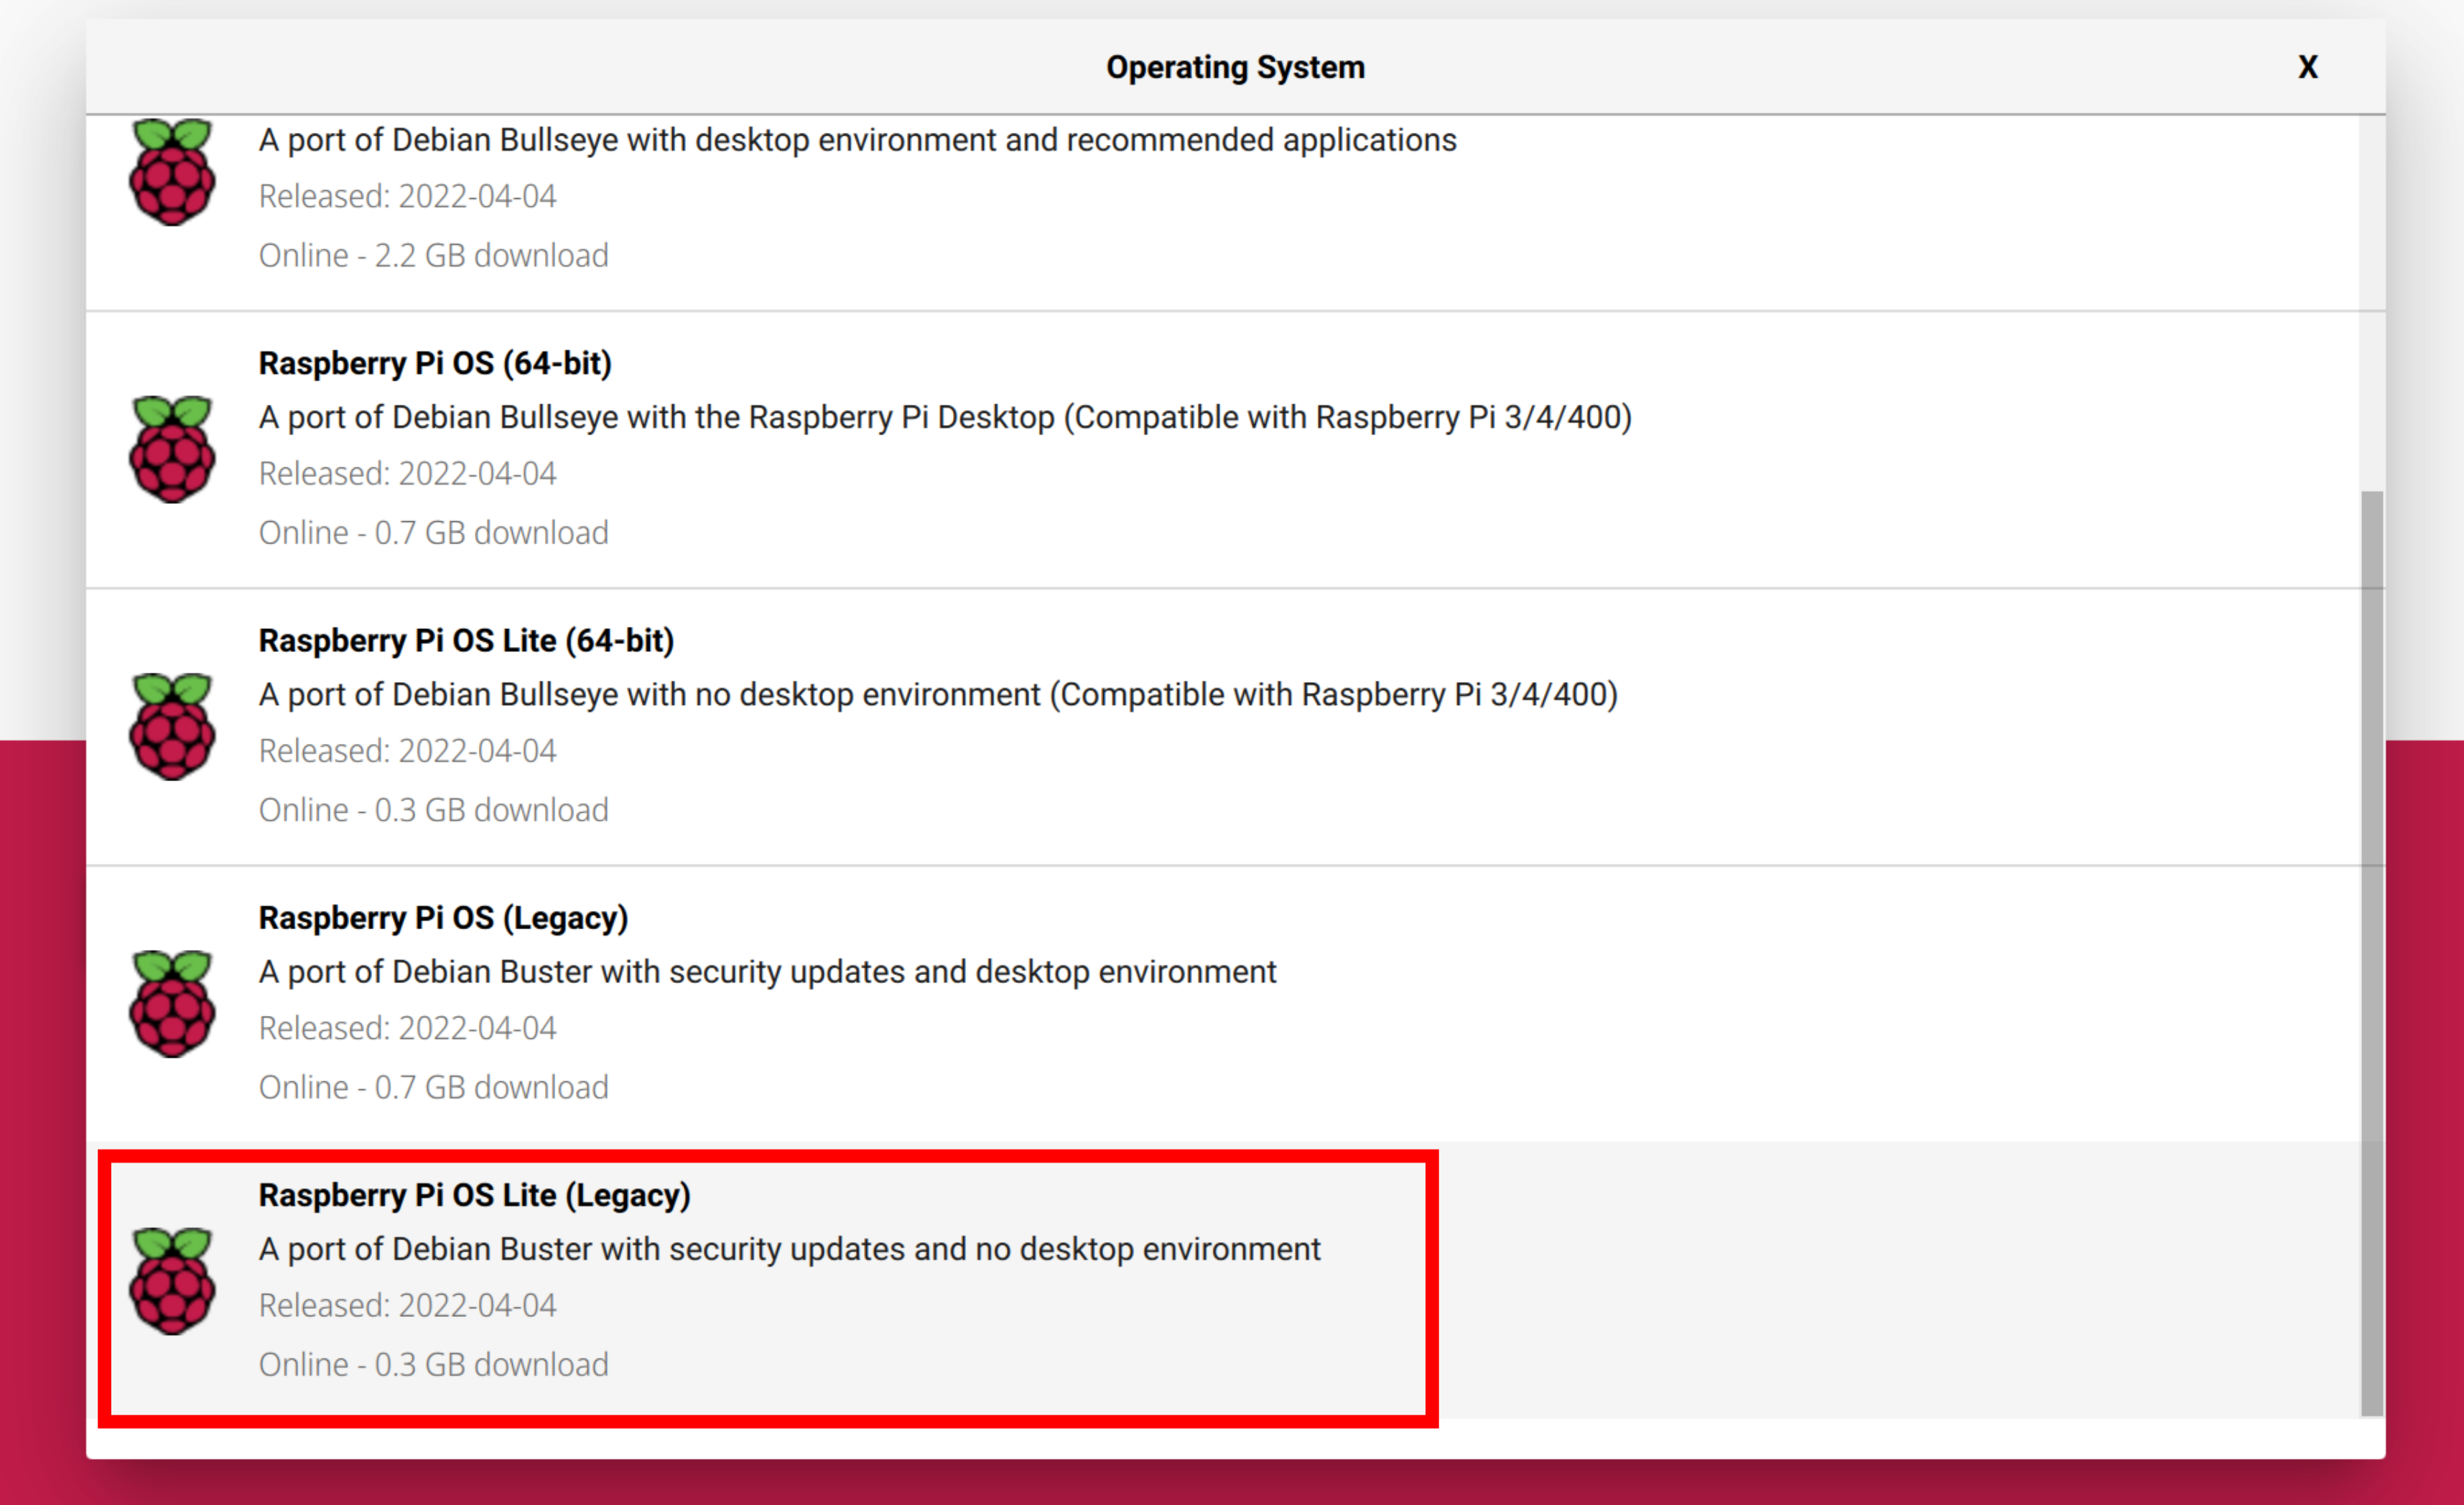
Click “Choose OS” and select Raspberry Pi OS (other)

Select Raspberry Pi OS Lite (Legacy). Verify that it is “a port of Debian Buster”.
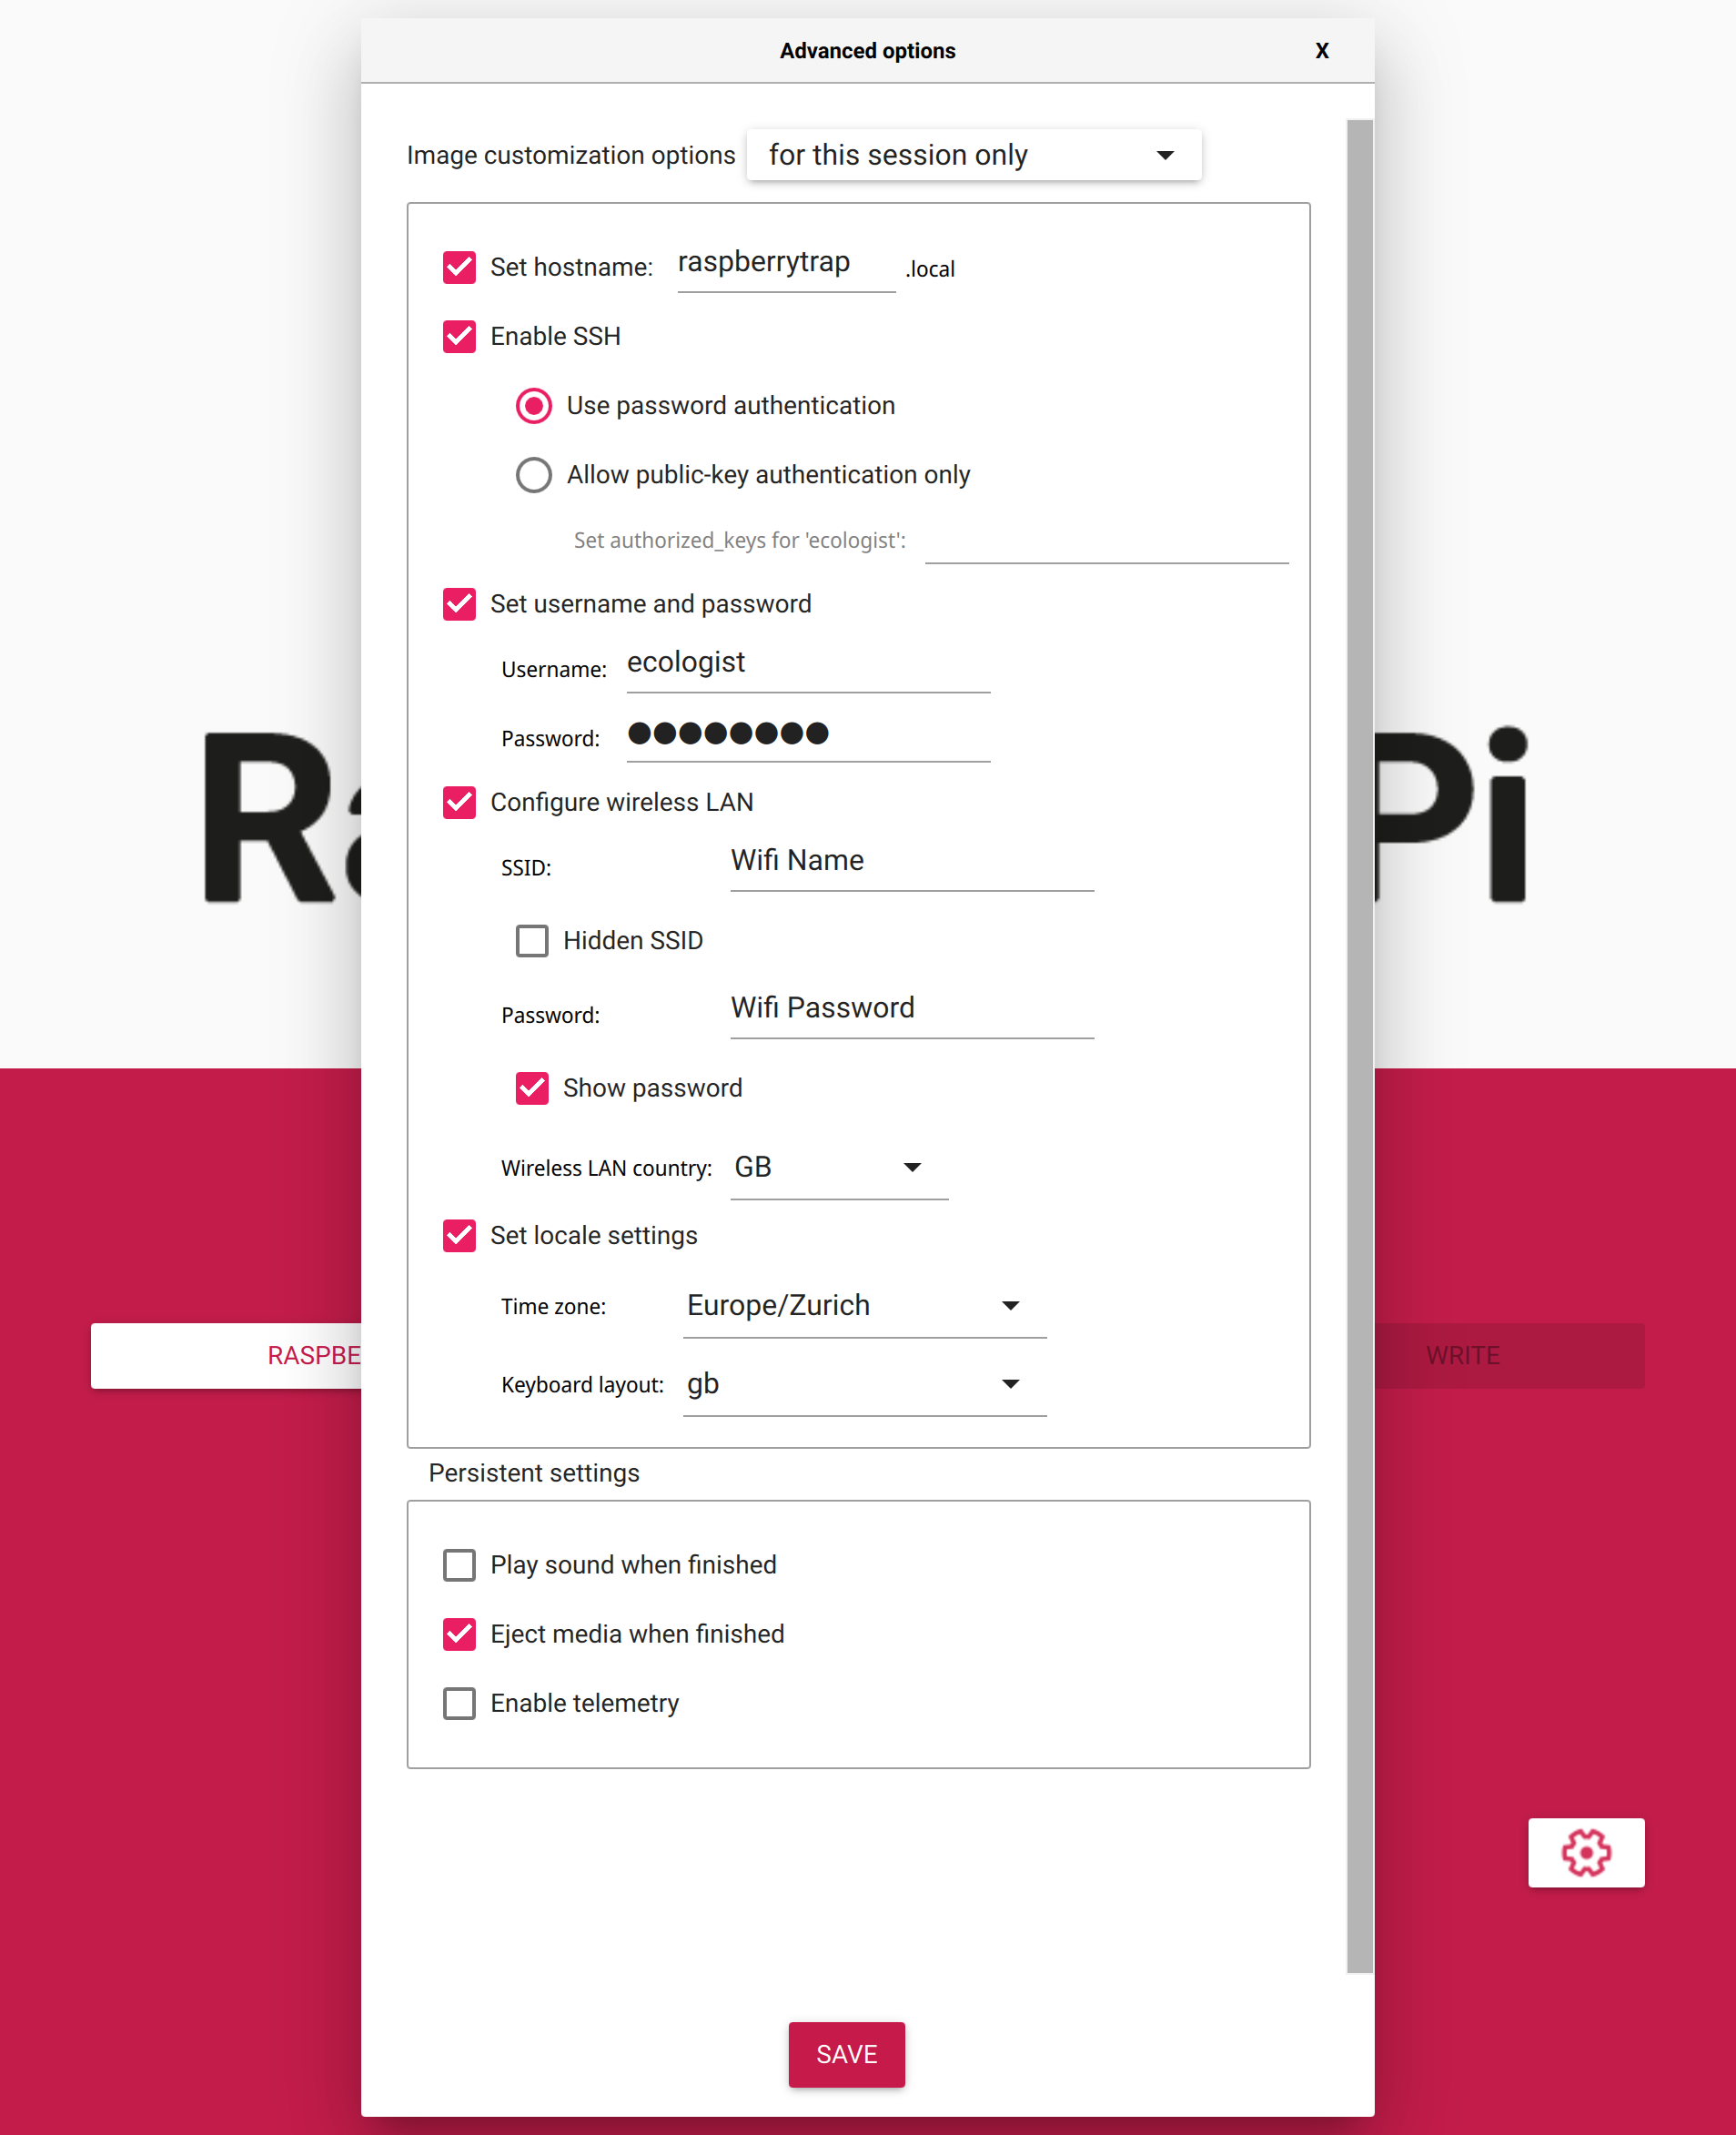
Now, we must configure the network and login details. Click the settings icon in the bottom right corner. Fill in the settings
Set hostname. This is what your Raspberry Pi will be called on your local network. We have called it
raspberrytrapin our example. Whilst it is possible to put spaces in the hostname, we recommend not to do this. Instead perhaps use a hyphen.Enable SSH. This will allow you to log into your Raspberry Pi over the network. Select “Use password authentication”.
Set username and password. These will be the credentials you will use to log into your Raspberry Pi. We have chosen the username
ecologist. Whilst it is possible to put spaces in the username, we recommend not to do this; of course your password may have arbitrary characters.Configure wireless LAN. This is necessary, if you are not going wired internet for your Raspberry Pi.
Set locale settings. Set your timezone and keyboard layout. It is important to set this correctly, so that your password entry will be correct when you log in.
Select your SD card in the “storage” field. Ensure the correct card is selected, since all data on that card will be deleted.
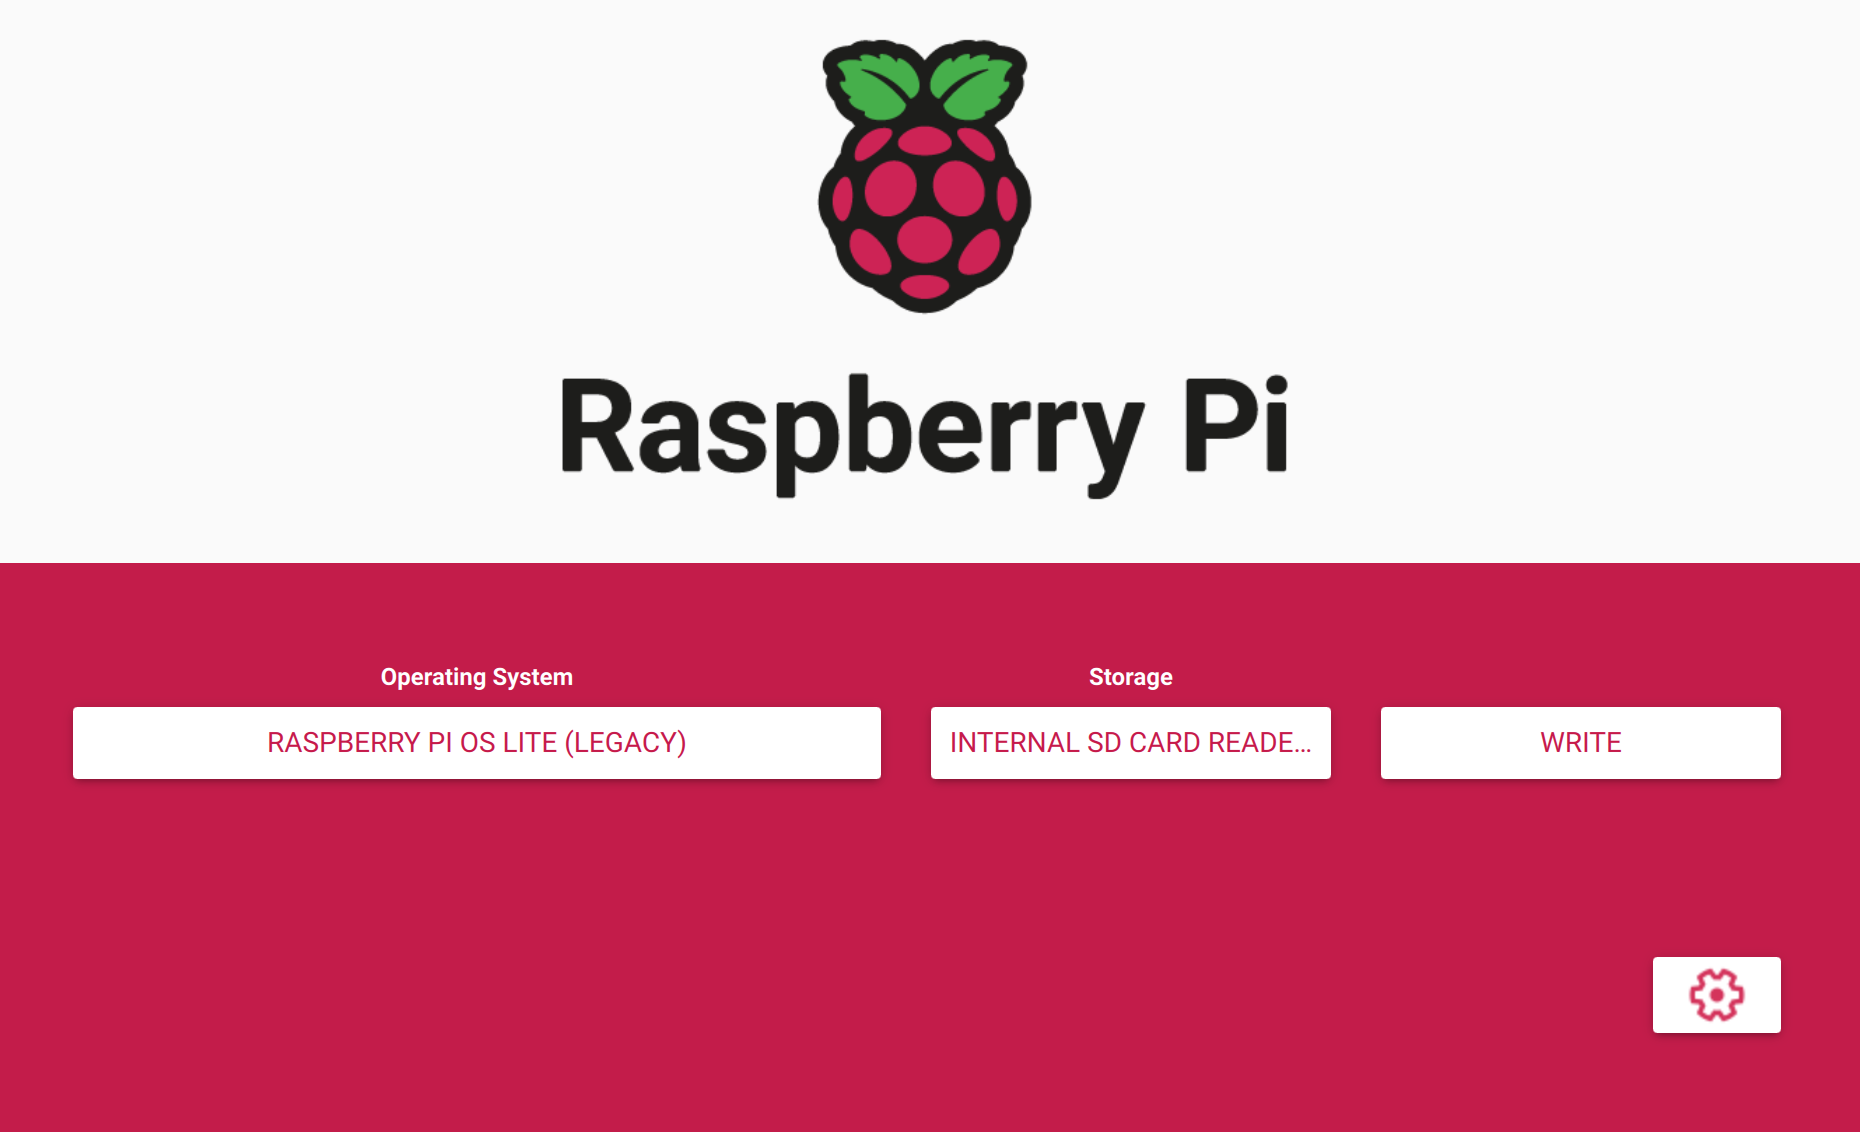
Finally, click “write” to write the OS to the SD card.
Back up data from SD Card!
Clicking “write” will irrevocably wipe all data on the SD card. Ensure that all important data is backed up before hand.
Booting for the first time#
Insert your freshly flashed SD card into your Raspberry Pi and connect the power supply. Your Pi should now start blinking.
After waiting around 5 minutes, to give the Raspberry Pi some time to boot up and initialise everything for the first time, you can try logging into your Pi using your SSH client.
If you are using Linux, MacOS, Blink (iOS/iPadOS), Termux (Android) or Powershell (Windows) (see table of ssh clients) ensure that your computer is connected to the same WiFi network as configured in the Raspberry Pi Imaging tool and open the respective terminal emulator and execute
ssh <username>@<hostname>
In our example it would be
ssh ecologist@raspberrytrap.local
Once logged in, you will want to update the Raspberry Pi. Do this with
sudo apt update && sudo apt upgrade
Once this is complete, it is probably best to reboot to ensure that all new software is running.
Troubleshooting the SSH Connection#
If you are having troubles logging in, you will have to troubleshoot your connection. There are a lot of articles about SSH and SSH on Raspberry Pis in particular. Of course the Raspberry Pi Foundation has an extensive guide for remote SSH access.
The most likely error to return is
connect failed: No route to host
This means that your computer cannot find the Raspberry Pi in the local network. This could be because they are not both connected to the same WiFi network. It could also be because your Raspberry Pi could not successfully broadcast its hostname on the network. In that case you will have to manually find out what the IP of your Raspberry Pi is in your local Network.
Other errors may occur because your router blocks SSH traffic (port 22), or because your password is incorrect.
2 Expanding the Filesystem#
Documentation
Se the official documentation raspberrypi.com/documentation/computers/configuration.html#expand-filesystem
By default, when Raspberry Pi OS is flashed to an SD card it only creates a small filesystem. For camera trapping usage we need to expand the filesystem so it uses all available space in the SD card.
To do this, from your Raspberry Pi, launch
raspi-config
You will be met with a Terminal User Interface (TUI)
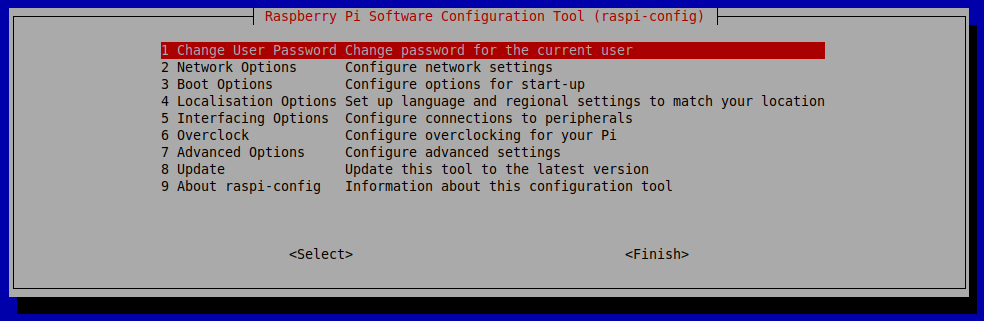
Navigate to Advanced Options > Expand Filesystem. For this to take effect,
you will have to reboot your Raspberry Pi.
3 Preparing Raspberry Pi Camera#
Wi-Fi and SSH Setup
This assumes that your Raspberry Pi is configured for headless usage and the camera module has been enabled.
Enabling the camera module software#
Documentation
Se the official documentation raspberrypi.com/documentation/accessories/camera.html
By default, the camera module is not enabled. To enable it, from your Raspberry Pi, launch
raspi-config
You will be met with a Terminal User Interface (TUI)
Navigate to Interfacing Options > Camera. For this to take effect, you will
have to reboot your Raspberry Pi.
Installing the Camera Hardware#
Installing the hardware camera module depends on which Camera and Raspberry Pi you have. Here is an example using the Raspberry Pi Zero W and the camera module.
Testing that the Camera works#
Execute
raspistill -o /tmp/test.jpg
on your Raspberry Pi to take a picture. Copy that picture to your local computer, by executing
scp <username>@<hostname>.local:/tmp/test.jpg test.jpg
e.g.
scp ecologist@raspberrytrap.local:/tmp/test.jpg test.jpg
on your computer/tablet/mobile phone. Then you can open the file test.jpg on
your local device to check whether the camera could successfully take a picture
and whether the picture was in focus.
Setting the focus of the Camera#
This depends heavily on what kind of camera module you have. The one we are using can be focussed by screwing the lens in further or loosening it.